Showing posts with label clothes. Show all posts

Tuesday, January 7, 2014

DIY Workout Tee to TANK!

With an exercise routine that keeps me nice & sweaty 5-6 days a week...I go through my work out clothes like CRAZY...and I just cannot justify spending a lot on articles of clothing that will just get drenched in sweat, and maybe the occasional tire marks from 115lb tire flips!!

Over to Pinterest I went and found this awesome tutorial: "No-Sew T-shirt to Tank Top". I had a few blah t-shirts from past runs that I knew would be perfect for this transformation! Here's one that I got from the Run or Dye 5K:

 photo TeetoTank1-edit_zps93eb8b3e.jpg


Then at Joann's, I saw these neon colored shirts on sale - 3 for $9! So I got pink, blue & green. After I washed & dried them, I stenciled on "Run Rest Repeat" with fabric paint onto the green one, love how it turned out!

 photo TeetoTank2-edit_zps5d136227.jpg


Still have the pink & blue to play with...going to see if I can find some other fun ways to jazz up a plain tee! YAY for inexpensive workout threads!


Sunday, May 19, 2013

Happy 4th Birthday Princess Kapri

 photo IMG_0047_zps7bc9e33e.jpg

Finally...our countdown on the kitchen chalkboard has come to an end - and literally ALL. MORNING. LONG. she was asking about every 2-5 seconds if it was time for the party... her very own "Princess & Pirates" themed birthday party:

As if I didn't have enough things to check off on my self-imposed 'to-do' list...I had to cope with a seriously anxious little girl...oye.

My helpers & I got there 2 hrs early to set up...though there is NEVER enough time...I felt insanely rushed....and sweaty. I ran home 15 minutes before the party was supposed to start, changed Kapri into her tulle dress...and she decided at that very moment to tell me how itchy it was...o...m...g.

{{CLICK HERE to see the post about making her tulle tutu dress, picture overload!}}

It was now the time the party was to start...and we were there yet...whooops!! So I slipped on a pink tank underneath, changed into my dress...and off we went. Little princess was about 20 minutes late to her own party...ah well - she looked beautiful!


 photo HappyBirthdayKapriPics_zps02ec6cbd.jpg

 photo IMG_0050_zps2950b677.jpg
coral ladies - seriously not planned!
Pirate James & Princess Steve


Food & Treats table: princess & pirate cupcakes, "royal PB&J's" (were supposed to be in a crown shape, but the cookie cutter I had wasn't really workin with this bread...I think I should've refridgerated the bread overnight so they didn't just break when I went to use the cutter), "sword kabobs" (salami, cheddar cheese & gouda cheese), and "fish-n-chips" (literally! haha):

 photo PartyFood1_zpsee5a89ae.jpg

More food:  blue & pink swirled lollipops from Oriental Trading (HUGE hit with the kids), "pirate jello sails" (idea HERE), "wish upon a star" cookies (vanilla yogurt cookies from Trader Joes), and "pirates booty" cups:

 photo PartyFood2_zps6bcfb805.jpg

Saw these Fruit Wands on Pinterest (HERE) - and knew they'd be perfect!! I love how they turned out!
 photo WatermelonStarFruitWands_zpsfaf1242c.jpg

I found these 'lace' style plastic table covers at Walmart for less than $2 each... they were actually really pretty! The drink containers were filled with "Pirate Sea Water" and "Princess Punch"...scored those from Kirklands Home store (I added a chalkboard sticker in front to name them).
 photo PartyPics1_zpsa57ee066.jpg

I can't seem to find a picture of it...but next to the gifts I had an 11x14 framed image of this...I made it using PicMonkey:

all 11 Disney Princesses - so stoked I found this image!!

The goodie bag station... love the little tissue paper tassel garland my sisters & I made to hang on the table (tutorial HERE)... took a little time & finesse, but turned out great I think!
 photo GoodieBagTablePics_zps54262892.jpg

The goodie bags were filled with fun toys I bought from Oriental Trading... stickers, necklaces, rings, chocolate coins, & stamps... I made ones for both girls and boys:
 photo GoodieBagPics_zps886b9a2a.jpg

Kid activity tables... make your own foam pirate hat and/or princess crown (with sticker embellishments), treasure hunt list & easy-to-assemble paper treasure boxes to store their loot in, a tattoo station, and a coloring/bubble station:
 photo KidsBdayActivityTables_zps05d45a93.jpg

The girls were obsessed with the 'poster' princesses - they got to pose with them & take pics... too cute. I didn't buy this... my sis did during a last minute Party City run...it was maybe $6 and came with 2 pieces that you tape up together...and a separate "Happy Birthday" sign...pictured above...between 2 pink balloons on the outside/doorframe of the rec room.
 photo PicswithPrincessPoster_zps6b11dd2e.jpg

A few pics of our fam & friends enjoying the day...loved seeing all the kiddos dressed up as either a princess or pirate...what kid doesn't like to dress up?!!

 photo PartyKids_zps54a94ab2.jpg

Outside play time... Tinkerbell boucy, treasure hunt in the sand, slides & swings...oh what fun!
 photo JumpySwingTreasureHunt_zps62269b4a.jpg

She LOVED her special Cinderella cupcake (scored for $7 at Ralphs of all places the day before!!):
 photo HappyBirthdayKapriCakePics_zps77e09eb4.jpg

Here's a vid of everyone singing to her (she was shy, but it was adorable!):


One quick family shot (only one pretty much), as we finished cleaning up the rec room & headed home after a long day of fun!
 photo IMG_0045_zpsad38237f.jpg

Oh...and here's a photo collage of her last year... I make one for every birthday...love looking back at these:

Cannot believe we have a FOUR year old!!

Linked up to:


Thursday, May 16, 2013

K's PreParty Pics ~ Tulle *Tutu* Dress

Kapri's 4th birthday party is fast approaching..which is a "Princess & Pirate" theme (cannot wait!). Together, we had searched all day a few weeks ago for a fluffy, pink 'princess-y' dress.

No luck.

I later showed her a few pictures of 'tutu' tulle dresses that I had pinned on her bday Pinterest board...and she liked them! YAY - I can do this.

To determine the length, I measured from her armpit down to her ankles, doubled that length & added 1" (to allow for the knot along the elastic top - this gave me the measurement to cut each strand of tulle. Example:

  • Armpits to ankles = 28"
  • Doubled = 56"
  • Plus 1" for knot = 57" pieces of tulle

Then off I went to gather about 5 rolls of bright pink tulle (Walmart = $2.99/roll... 6" x 25yards). I had some inch wide elastic & measured around her chest (just under armpits), minus 3 inches to make sure it was 'snug' & didn't slip down...then sewed the ends together.

When making tutus, I like to use a new, thick roll of paper towels, so I just followed the same process (search YouTube for a ton of how-to vids)... took me a few hours but it was definitely worth it! With about 1/2 left, I put it on her to make sure it fit around the chest okay...she cried when I had to take it off - so that was a good sign!


Finally I added a coordinating satin ribbon that I had on hand, embellished it with some sparklies, & tied it around, just under her chest...but not quite to her waist...so it gave it an 'empire' look. Then I added a more sheer ribbon in front, to tie around her neck for added support.

And of course every birthday princess needs her own crown & wand...felt, hot glue, tulle ribbon, a wooden dowel, a headband and some more sparkly jewels - done & done!

I cannot believe how easy this was to make & how great it turned out...she loves it. I love it...win/win! She'll be the 'belle of the ball' for sure in this perfectly pink poofy princess tulle dress!

{I had actually made a few star wands for the street fair & didn't sell them all...which was totally fine, since I realized I could use them to give out to the other 'princesses' at her party! On her wand, I just added a matching jewel to her crown to make it a tad more special}


After everything was finished, my youngest sister & I took K to a local trail/lagoon area that we've walked through a few times in the past. I knew it was the perfect spot to take pictures of Kapri frolicking around in her new, bright, fluffy dress! I cannot believe how many pics I took (with my iPhone 5!!) and how many came out really great...it was the perfect setting that I envisioned in my head! Pics edited with "SnapSeed" app.

**WARNING**
Picture overload below...These are a 'few' of my favs!!
 photo WhiteUmbrella2logo_zps23d36aa5.jpg

 photo WhiteUmbrella1logo_zps0848f632.jpg


 photo FieldCollage4logo_zpsff94a825.jpg

 photo FieldCollage3logo_zps3781ca04.jpg

 photo FieldCollage2logo_zps21a84d8e.jpg

 photo FieldCollage1logo_zps09c3c33f.jpg

 photo FieldFace1logo_zps8bebaa80.jpg
 photo FieldFace5logo_zps212786a0.jpg

 photo FieldWalking5logo_zps8d184cb7.jpg

 photo FieldWalking3logo_zps039c3520.jpg

 photo FieldFace4logo_zpsd1165afc.jpg


 photo FieldWalking2logo_zpse3a841c8.jpg


Linked up to:


Monday, May 7, 2012

Baby Shower Gift Set

This past Saturday I was unable to attend my neighbor's baby shower/sprinkle (baby #2) - but I was able to find some time to make this cute gift set & drop it off just before the party started.

I purchased little birdie fabric (to match her nursery theme), to make an initial onesie with, so what better to pair with an outfit, than matching itty bitty shoes?!

Baby shoes were definitely something I hadn't made before (attempted, but never finished)...something quick & cute - obviously... and these "Modern Baby Booties" from the Tao of Craft - were perfect!

Since this was my first attempt at making these, I know I have a bit to improve on - trail & error. The tutorial is a bit cryptic. For instance:
  • It doesn't direct on which shoes (left or right) you're working with... the soles should match up correctly to the top part of the shoes - not sure if mine did perfectly because you're working mostly while it's inside out...it's confusing. 
  • And the velcro strap...it should be identified as to which side to place it on for each shoe (left & right)...otherwise you may end up with the strap securing so they end up on the INsides of the shoe....no bueno...they should be on the OUTsides. 
  • Also, the strap is SO small/narrow...then when you sew it into a tube (inside-out), then try to flip it right-side out, it's pretty hard to accomplish (I re-did this about 3 times to get it right!)...I used a chop-stick to help flip it!

Maybe I'll make another pair or two, while keeping track of my steps so that I can make my own tutorial, haha!

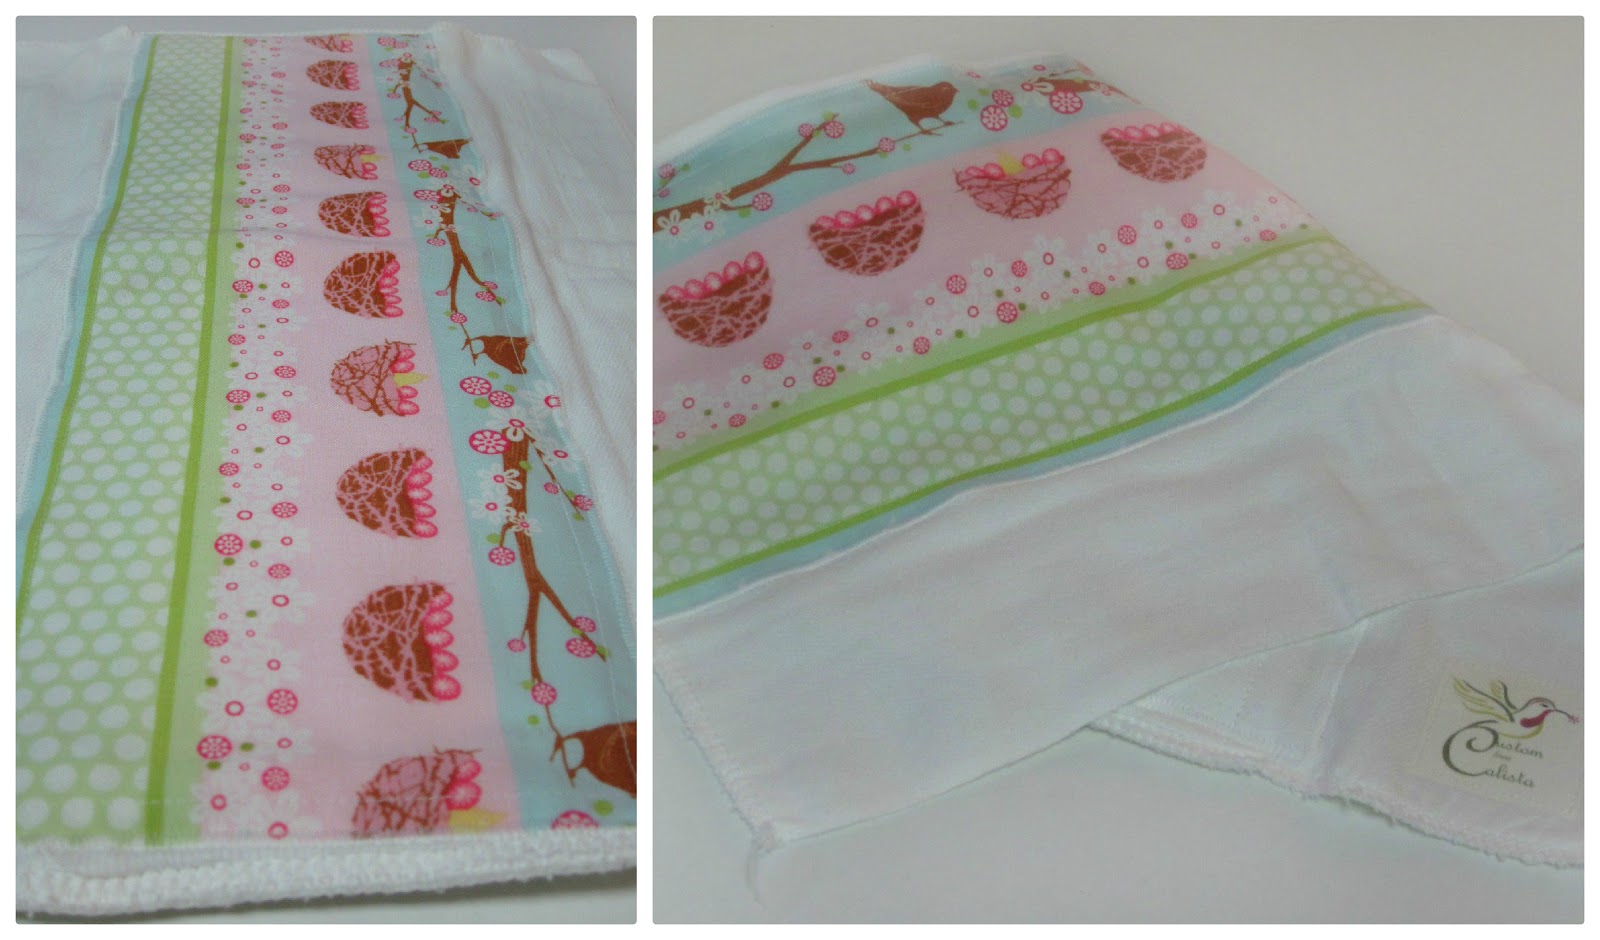
Then I found this fabric with birds on it and it literally screamed at me: "put me on a burp cloth!!!" - so I listened & did just that. It's beautiful. Definitely completed my gift 'set':


The little card is also handmade. I saw this adorable bird scrapbook paper and this pre-cut square paper, and knew they'd be a match. So I cut the bird to fit against the pre-cut piece, then glued them together. For the middle/text area, I cut out a smaller square from the top/pink part of the bird paper ...then sewed a little design on another piece & glued that on. This was actually cheaper than buying a store-bought baby shower card... less expensive, cuter, & one-of-a-kind - you can't beat that!


Wednesday, May 2, 2012

My love for tulle

Tulle is a great material...it's so bright & fluffy...and I just love it! I'm sure as soon as a little girl has it on, she feels like a princess - I did when I put my homemade tulle veil on, while getting ready for my wedding!

These contrasting colors of light pink, hot pink & grey are gorg:

 ...and I love how it looks once I've completed a full tutu like this one:

 ...even better when it's paired with an adorable letter onesie with coordinating fabric yoyo flower:

While making the flower for the onesie, I accidentally made it too big at first....so I added a sparkly button and glued it onto a headband for miss K:


Saturday, April 28, 2012

EASY Pillowcase Dress

OMG, I wish I could make one of these pillowcase dresses for me to wear...they look SO cozy!! Within about 2 hours from start to finish, I made 2 matching dresses for twin girls that are turning one this weekend - and I couldn't be more pleased with the outcome:

I referenced THIS tutorial to help guide me along. After the first one was made, I didn't even need to reference the tutorial again because it was that easy!

For different lengths I researched different sites (like this one) online and came up with this approximate age/range chart:
  • 0-3 mo = 15-17" long
  • 9-12 mo = 18-20" long
  • 18mo - 2T = 21-23" long
  • 3T - 7yr old = entire length of standard size pillowcase (about 32")
Easy DIY Pillowcase Dress with coordinating grey/pink/teal fabric flower clip

What you need to get started:
  • 1 pillowcase (or 2 in my case since I made these for twins!)
  • matching thread
  • coordinating ribbon
  • coordinating color bias tape
  • sewing machine
  • scissors
  • ruler or tape measure
  • iron
  • straight pins
  • safety pin
Again, use this tutorial if you're interested in making one of these adorable, easy, perfect-for-summer pillowcase dresses!

I'll update later with pics of the terrific twins in their new dressys!


Related Posts Plugin for WordPress, Blogger...
Blogging tips