Showing posts with label blog links. Show all posts

Tuesday, January 14, 2014

DIY Race Bib/Medal Display

I am in love with my recent DIY craft....which I happily stumbled upon the idea randomly on Pinterest. I wasn't even looking for this craft, but when I saw it...I knew immediately I just had to recreate one for both myself, and my friend Nic for her birthday (HAPPY BIRTHDAY friend!!!).

Here are 3 ideas I used to help get my wheels turning: 
So my search began for a large frame, wide enough to fit the bibs and to hang the medals. I kept striking out store after store....when finally, buried in a back clearance aisle at Michael's, I found these 2 grey frames that were PERFECT!

For the letters, I used my Cricut Mini to cut "R U N" from grey scrapbook paper, to coordinate with the frame color:


I was going to spray paint the back, but decided on scrapbook paper inside the frame instead....though you can kind of see the line where I had to join the 2 pieces together, but I still think it came out great!

To hang the race bibs, I used 2 metal/magnetic-back hanging clips...and for the medals, I used 1 silver hook - all are directly on the glass with little adhesive squares, that hold up to 5lbs each....so I think they are pretty secure.


Can't wait to add more to this growing collection!!

Mine

Nic's


Tuesday, January 7, 2014

DIY Workout Tee to TANK!

With an exercise routine that keeps me nice & sweaty 5-6 days a week...I go through my work out clothes like CRAZY...and I just cannot justify spending a lot on articles of clothing that will just get drenched in sweat, and maybe the occasional tire marks from 115lb tire flips!!

Over to Pinterest I went and found this awesome tutorial: "No-Sew T-shirt to Tank Top". I had a few blah t-shirts from past runs that I knew would be perfect for this transformation! Here's one that I got from the Run or Dye 5K:

 photo TeetoTank1-edit_zps93eb8b3e.jpg


Then at Joann's, I saw these neon colored shirts on sale - 3 for $9! So I got pink, blue & green. After I washed & dried them, I stenciled on "Run Rest Repeat" with fabric paint onto the green one, love how it turned out!

 photo TeetoTank2-edit_zps5d136227.jpg


Still have the pink & blue to play with...going to see if I can find some other fun ways to jazz up a plain tee! YAY for inexpensive workout threads!


Saturday, November 2, 2013

Craft HEAVEN - at the Queen Bee Market!

OMG - died & gone to craft heaven!!


The 2nd day of the annual "Queen Bee Market" or "QBM" was today in Oceanside, CA. and HOLY creativity overload....it was like, ETSY come to LIFE!

Can you tell I was/am excited???

I had seen a posting for 'behind the scenes' people to help work the event...and I jumped all over the Opportunity. They asked us to submit an application and in the comment section I wrote:

"I cravvvvve to be around like-mided crafy people, who have a similar passion for making goodies with their own glue-bun blistered hands and ridiculously creative brains! I would be SO honored to get the opportunity to work behind the scenes the the QBM in November and soak in all the sweat, glitter and glue that will surely permeate the air!"

I know - I'm crazy. But since I couldn't afford or have the time to prep...I figured just BEING there would be fulfilling enough.

So I got to work the entry from 8am-noon, doing admissions...and of course seeing people leave with some awesome goodies! I even got the CUTEST little engraved wooden name badge to wear (see pic below). It was great working with the event creator, Mique (aka: The Queen Bee"), and her friend Katie - such lovely ladies (THANKS to you both for letting me be part of this AWESOME day!!)

Definitely going to lend a helping hand to them for their future events!!

Booths pictured below: (top 2, & bottom left were of the main entry) Joyful Joyful Designs, Creme De La Gems, & Bloomies
 photo QueenBeeMarket1_zpsf3600ba1.jpg

There was just SO much going on... luckily though since I got there on the 2nd day, and early in the morning before the vendors arrived...their booths were already set up and stocked from the day before!! So I had free rein to cruise around and take all these amazing pictures, before the crowds arrived and the inventory flew off the shelves!

Booths pictured below: She Does Justice, Salty Bison, The Printed Palette, A Handcrafted Home, Flea Market Sunday, &  Sweet Funky Vintage
 photo QueenBeeMarket2_zpsd875874e.jpg

So. Many. Crafty. People!!!!  Talk about being inspired to your CORE!

Booths pictured below: DeeDee Motique, Junk Art Gypsy, Stuck in the Coop, Fresh Baked {Paper Goods}, Little Bird, Inspire Lovely, & Bubba's Basics
 photo QueenBeeMarket3_zpsce477365.jpg


Saturday, October 26, 2013

Run to Fight Children's Cancer {Ronan Foundation}

If you follow or have seen/heard of the "Rock Star Ronan" blog - you've likely cried a time or two...and been affected immensely by this woman's story. I first heard of her after hearing Taylor Swift perform the song "Ronan" on Stand Up2Cancer that aired on TV back in Sept. 2012.

I sobbed. Kinda uncontrollably.If you haven't heard it...please do now...be warned, grab a BOX of tissues first:


After it ended, I immediately looked up who 'Ronan' was and I cried more reading post after post of this mom's blog. It's incredibly heartbreaking....yet, inspiring to see her gradually working through the daily ins & outs of something that NO ONE should have to go through.

My dear friend Nic also reads the Ronan blog...and when we both saw that there was a 5K coming to San Diego called "Run to Fight Children's Cancer" - we knew immediately that we had to do it....like it was our small way of showing support. Support for all the kids fighting cancer, those who have beat it, those who have lost their battle, and support for all their family & friends affected by this terrible word: C-A-N-C-E-R


I haven't run a race of any kind since the Rock 'n Roll 1/2 Marathon back in June 2012 {read ALL about that HERE} - so I was definitely a bit anxious for this one...though it was only 3 miles, compared to 13!!, I knew we could do it...

We showed up bright & early, dressed in our purple & gold...ready to RUN. There were lots of families there, including kids that were either fighting cancer or were in remission -- and those kids were given little capes to wear that said: "Cancer Fighting Super Hero":
  Post by Run to Fight Children's Cancer.  Seriously great idea!

It was a beautiful course, around the bay through Point Loma...and at the end I made us SPRINT...then we finished, huffing & puffing... tears came to our eyes. If they have this race here again, we'll definitely be there!

 photo RuntoFightCancer_zps4eea67e0.jpg


Monday, September 9, 2013

DIY Wedding Emergency Jar

I sooooo wish someone had given me this before my wedding... damn you Pinterest for not being alive in 2006/2007!!

This is the most clever, practical gift... you just never know what you may need in case of 'emergency', the day of your wedding!! And you cannot lie that it's even cuter being in a mason jar! I had done a "Hospital Survival Kit" in a paper bag to give a new mommy...but the jar is just plain adorable.

In preparation for a small brunch get-together I was invited to for a friend, I stalked her Pinterest boards and found THIS pin - to which I proudly proclaimed: "I can totally do that!!" 

So here's the list of items I bought & jammed into the jar:
  • Kleenex
  • Band-Aids
  • Bobby pins
  • Advil
  • 2 'Wisps' -mini, disposable tooth brushes
  • Sewing Kit (with scissors, pins, needles, thread, buttons)
  • Tampons (you never know!!)
  • Seam ripper
  • Nail clippers
  • Tweezers
  • Nail file
  • Visine
  • Gum
  • Burts Bees Mango Lip Balm
  • Tums
  • Mouthwash
  • Purell
I'm kind of amazed this all fit inside ONE mason jar!!

And seriously how cute is this little sewing kit I found??

Then I found a little mini wooden chalkboard label (re-used from my street fair booth price stands), and glue some twine to the back...then wrapped it around the jar so it hung nicely. Added some burlap, a button, some lace ribbon...for extra cuteness. 


And for the lid, I just followed THIS super simple tutorial with some extra thick cloth fabric, polyfil & a glue gun.


love, love, LOVE how it turned out - it's all about finding the inspiration, then tweaking a few things to make it your own:

I think she loved it as well & hope she gets a little use out of it during her destination wedding in Hawaii next month :-)


In addition to the emergency jar, I also gave her a personalized wooden hanger, with her soon-to-be new last name in wire...perfect for hanging up her wedding dress the day-of!

This exceptionally beautiful, hand-made hanger was made by the super talented San Diego-based: "Burlap Babe" - who far exceeded my expectations, booth in speed (I ordered it with a day turn-around request) and in quality - I mean...I'm crafty & could have attempted this myself, but it would've looked like a preschooler made it! Check out Burlap Babe's site (linked above), her Etsy shop & FB page!


Can't wait to see pics of her dress hanging up on this unique piece of work:


 Congrats Crystal & Lucas!! 


Sunday, October 7, 2012

Princess Party #1

On Saturday I took Kapri to a super fun 'princess party' for her friend Audrey who turned 3 (coincidentally, we have another princess party, for another 3 yr old, Aubrie in a few weeks as well!). I had just bought FOUR new princess dresses since they were only $15 each! She was SO excited to pick out Snow White to wear to this party:


The girls were SO excited & SO mesmerized by the special guest, Ariel... with her big gorgeous teal dress, bright shiny red hair, sweet personality, and pretty amazing voice!

Birthday Girl Audrey & her friend, Princess Ariel


I decided to make A her very own embroidered pink princess wand, with a pretty lace tiara (tutorial HERE) - I was so happy with the outcome! The 'wand' I found at a local fabric store, that was plain cardboard, just the stick & circle attached to the top. So I covered the stick in pink ribbon, and mod podge'd the polka dot embroidered fabric onto the circle. Then I tied some thin, different colored ribbons to the top and curled them.

Now of course I have to make Kapri her own too, haha!


Friday, September 28, 2012

Friday Night Quinoa "Burgers"

Had my sis over tonight...she's been into 'clean eating' lately, and mentioned wanting to try Quinoa Burgers. After seeing THIS recipe on Eating Well Living Thin(er!) - I was drooling. It looked so good...but could it really taste good too? It was time to find out. So while James was at work, she came over, we worked out to Jillian Michaels, then made this yummy dinner.

Kapri started getting sick yet again - she literally was JUST sick 2 weeks ago...oye. Damn germs. So she just chilled on the couch watching The Cat in the Hat movie on my laptop during our quick 30 min. workout.

We followed the recipe exactly, except with whole wheat flour - but we found that the flavor was pretty bland (hence the extra sprinkle of Mrs. Dash on my avo in the pic below). Also, using a large flat griddle brushed with olive oil made it faster to cook a few at a time, 10 total.


Next time I'll definitely add more spice to the mixture and blend up the cottage cheese a bit more so there aren't as many large chunks. I'd also like them to be a bit more crisp on the outsides...OR, I just read in the comments of the recipe post, that they can also be baked on a greased baking sheet at 350 for 25 min or so...note to self for the future ;-) 
I used 2 patties, as they were made a bit too small
So that's that - I used organic hamburger buns from Spouts - only 95 calories in each...some mustard, lettuce, cilantro & avo - so dang tasty & super filling!! Paired with some sweet potato fries, we had ourselves a healthy little dinner!

I should also mention that we *attempted* to make Cauliflower Mash - however that did NOT turn out so well.


Saturday, April 28, 2012

EASY Pillowcase Dress

OMG, I wish I could make one of these pillowcase dresses for me to wear...they look SO cozy!! Within about 2 hours from start to finish, I made 2 matching dresses for twin girls that are turning one this weekend - and I couldn't be more pleased with the outcome:

I referenced THIS tutorial to help guide me along. After the first one was made, I didn't even need to reference the tutorial again because it was that easy!

For different lengths I researched different sites (like this one) online and came up with this approximate age/range chart:
  • 0-3 mo = 15-17" long
  • 9-12 mo = 18-20" long
  • 18mo - 2T = 21-23" long
  • 3T - 7yr old = entire length of standard size pillowcase (about 32")
Easy DIY Pillowcase Dress with coordinating grey/pink/teal fabric flower clip

What you need to get started:
  • 1 pillowcase (or 2 in my case since I made these for twins!)
  • matching thread
  • coordinating ribbon
  • coordinating color bias tape
  • sewing machine
  • scissors
  • ruler or tape measure
  • iron
  • straight pins
  • safety pin
Again, use this tutorial if you're interested in making one of these adorable, easy, perfect-for-summer pillowcase dresses!

I'll update later with pics of the terrific twins in their new dressys!


Monday, March 26, 2012

Melt in Your Mouth Muffins!

Well with all this hype over some pretty yummy looking muffins - I decided to give it a go yesterday. 

It was a cold, windy & rainy...so the day was spent entirely inside. No errands to run & no energy to get off the couch to pick up ingredients I didn't have. So I had to work with what I had.

While K was taking her nap, I spent a fair amount of time looking through all 120 pins on my "Yum in my tum...treats" board, and finally found 3 recipes that we could make together - it was a toss up between cinnamon cookies (snickerdoodles), cinnamon breakfast bites, or these 'cinnamon muffins'.

She's a smart girl...

We like simple, easy to follow recipes like this {recipe here} - they were a perfect after-dinner treat, though even more amazing with my coffee this morning...mmmmm

Seriously...who doesn't like cinnamon & sugar? Oh and butter! haha


Tuesday, November 15, 2011

Introducing - my craft corner!


Calista's Craft Corner is DONE!

I cannot believe I have transformed this little area in only 4 days. I'm soooo mad at myself for not taking a BEFORE picture. But you can just imagine it in your head....computer monitor, keyboard, mouse/mouse pad, speakers, stacks of paper, blank/recordable CD's, and an old school 1985-style hideous lamp.

Booorrrringgggg. It needed a little T.L.C.

Prepare for picture overload...excuse the crappy iPhone pic quality...cam is still on the fritz. I'm so much more inspired now with my bright 'n cheerful craft space & cannot WAIT to create more fabulous "Custom from Calista" orders here in this little corner!! Bring it!

So first is my repurposed "CRAFT" sign...recycled from an old "martini" sign I had laying around. I bought the white wooden letters from Michael's at $2.99 each, but used a 25% off entire purchase coupon, score!

I made a few of the famed items...obviously the burlap "Calista's Corner" sign that I'd previously made.
yucky colored desk...one day I will paint it!

I bought some embroidery thread and simply wrapped it around cardstock paper shaped like bobbins, then glued them onto the paper behind it (no glass in front so they pop out with a 3-dimensional look). Love all those bright colors.

Then I printed out a vintagy French lace bobbin picture and typed in "être inspiré " in the lower left corner, which means "Be Inspired". I also found a cute vintage dress form pic online & just printed it out. Then I saw this inspiring quote by Julia Child on Pinterest & thought it'd be perfect for my corner.

I also found this on Pinterest and re-created it in Picnik to my liking.


I had the ribbon holder before, previously installed on a wall in my dining room...

But then I found a discounted $5 paper towel roll at Ross & voila! Instant ribbon holder for those with smaller holes that won't fit on the actual 2-tiered ribbon holder on the wall (& I still have a whole other box of ribbon spools too...oye). Also at Ross I found the wire dress form (lower right corner of pic) for $7 that I just could NOT walk away from...it was screaming my name - I knew she'd be right at home on my craft corner desk. I think she'll come in handy for taking pics of future new flower clips, necklaces (like below), or even bibs!

Next to that is a flower vase, made from an old syrup bottle (the Grade B stuff from Trader Joes - which I commonly use while doing the Master Cleanse). I just cleaned it out really well, scrubbed off the outside labels, spray on a couple coast of white paint, then when it was dry I wrapped some grey-ish yarn around it (glue gun not even needed!)...then stuck some fake pink hydrangeas (from K's 2nd bday party) inside. Perfect floral touch to my desk...me happy!

The hanging shelf in the top left corner of pic is actually a $12 shower head rack, haha...perfect! The little jars on the 4 boxed-shelf are $1 from Michael's (also bought along with the wooden letters with coupon) - perfect for all my buttons!


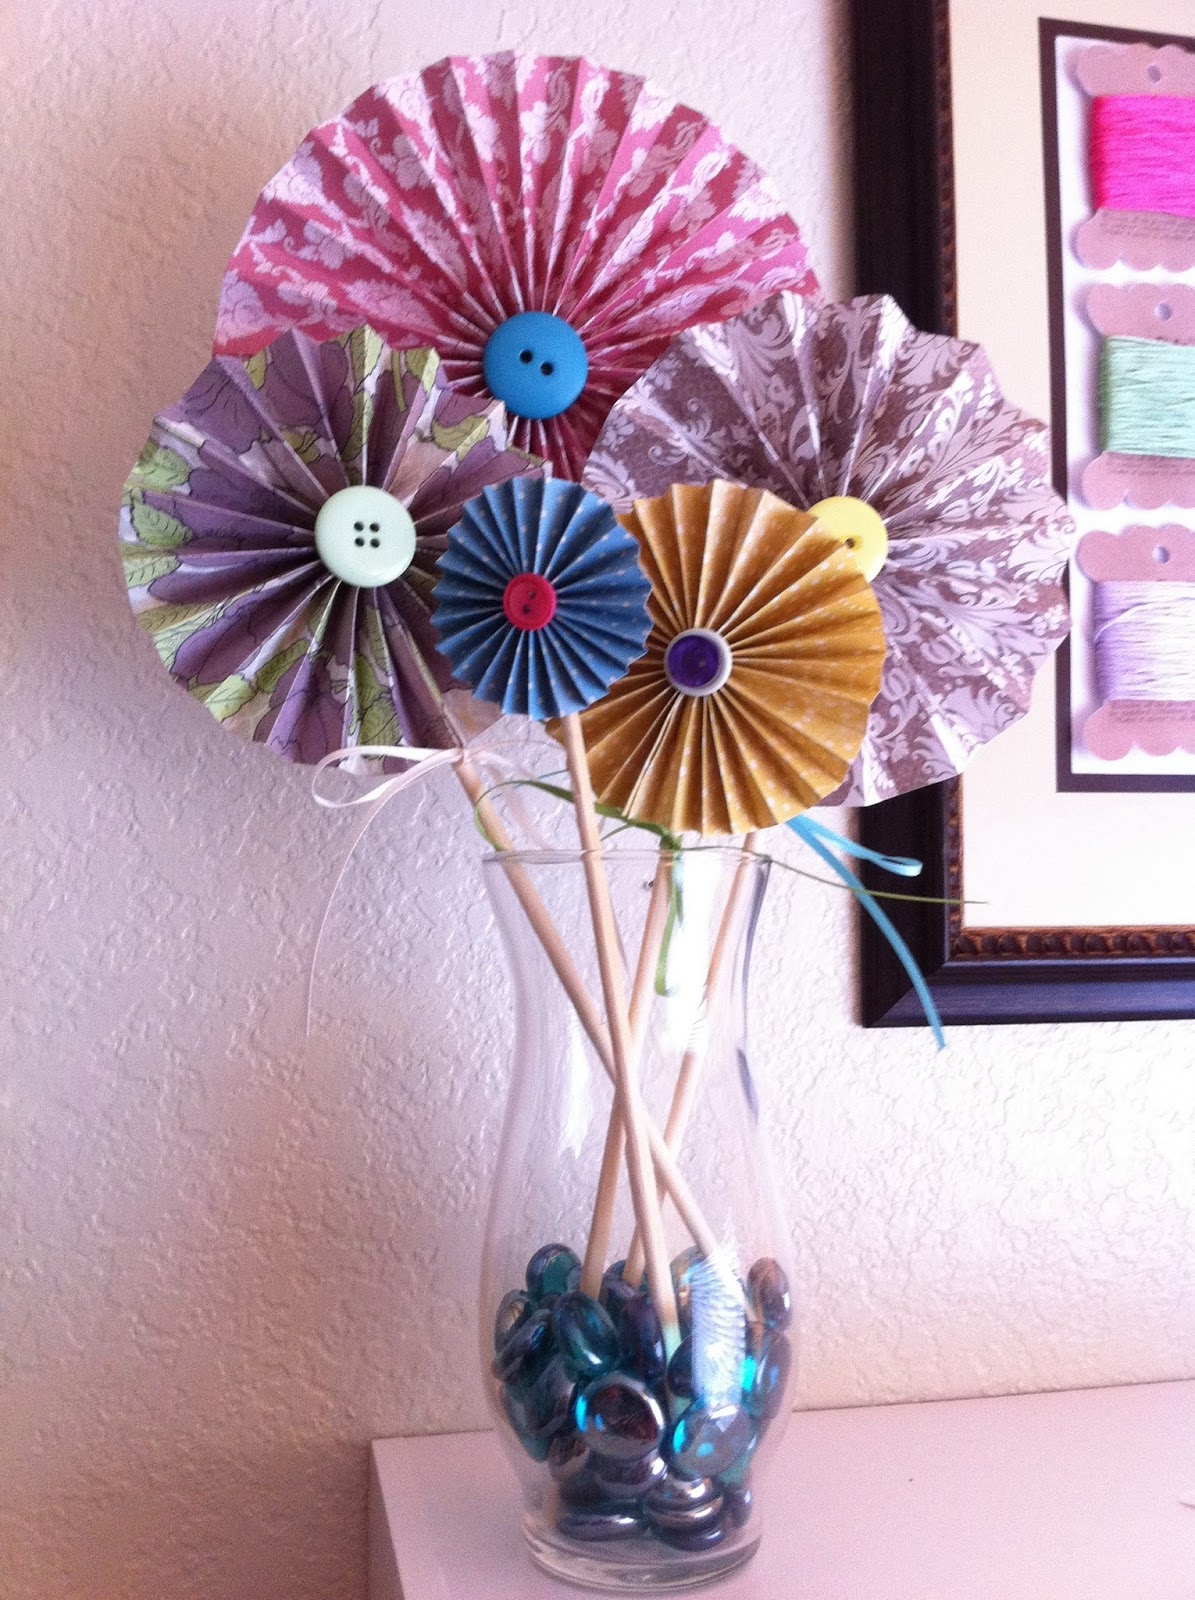
The flowers on top of that shelf are paper flowers with buttons in the middle that I made...and I love them dearly - they were so simple to make and I love all the bright, contrasting colors all together in a little vase with glass 'pebbles' on the bottom.

I found the magnetic knife strip online for $15, because I knew I needed to keep all my scissors up high, out of reach of Kapri's curious little hands...so they're up high in the corner, even somewhat difficult for shorty me to even reach! Another fav online find is the thread spool rack, with a little wire shaped sewing machine on the stop. I thought I had less thread than this....sooo, I may need to find another way to hang more in the future.

And last but definitely not least...my fav items would be these 3 dress form mannequin pin cushions!!! I am so in love with these...not only were they relatively easy & quick to make...but they are adorable AND practical! Because they're filled with poly-foam stuffing, they make the perfect holder for pins! It's just genius. I stumbled upon this "DIY Dish" how-to video late one night, when I should've been sleeping...but I just couldn't get over these & knew I had to make them. My only annoyance is that the glass candlestick did NOT adhere to the fabric bottom of the dress form...it literally came off the next day. So I had to reattach them with E6000 glue. Problem solved ;-)


Related Posts Plugin for WordPress, Blogger...
Blogging tips