Showing posts with label burlap. Show all posts

Sunday, October 27, 2013

Dylan's Beachy Baby Shower


Loooooved the theme & color this baby shower I attended for a friend, Christina...and her 3rd baby on the way, Dylan. It was coral & beach-y with accents of burlap - just beautiful!  So of course when asked to do a diaper cake for the shower, I was SO excited...

This is definitely one of my favs to date, and was the tallest as well...being 5 tiers, compared to the typical 3 (and occasional 4):

 photo ChristinasBabyShower1_zps8b873bad.jpg
front & back (with headbands & burp clothes pinned on)


The simplicity of the burlap table runners, sprinkled with seashells & starfish and a vase of beach sand was so perfect!! They even had adorrrable SAND-DOLLAR cookies!! love love love

The 4-tiered cupcake stand was handmade by the hostess' fiance - which turned out friggin AHmazing...next time I needs something like that, I will be callin him up to place an order for sure!!

So excited to meet Miss Dylan Gray - great name!!

 photo ChristinasBabyShower2_zpsbea5d18d.jpg


Monday, September 9, 2013

DIY Wedding Emergency Jar

I sooooo wish someone had given me this before my wedding... damn you Pinterest for not being alive in 2006/2007!!

This is the most clever, practical gift... you just never know what you may need in case of 'emergency', the day of your wedding!! And you cannot lie that it's even cuter being in a mason jar! I had done a "Hospital Survival Kit" in a paper bag to give a new mommy...but the jar is just plain adorable.

In preparation for a small brunch get-together I was invited to for a friend, I stalked her Pinterest boards and found THIS pin - to which I proudly proclaimed: "I can totally do that!!" 

So here's the list of items I bought & jammed into the jar:
  • Kleenex
  • Band-Aids
  • Bobby pins
  • Advil
  • 2 'Wisps' -mini, disposable tooth brushes
  • Sewing Kit (with scissors, pins, needles, thread, buttons)
  • Tampons (you never know!!)
  • Seam ripper
  • Nail clippers
  • Tweezers
  • Nail file
  • Visine
  • Gum
  • Burts Bees Mango Lip Balm
  • Tums
  • Mouthwash
  • Purell
I'm kind of amazed this all fit inside ONE mason jar!!

And seriously how cute is this little sewing kit I found??

Then I found a little mini wooden chalkboard label (re-used from my street fair booth price stands), and glue some twine to the back...then wrapped it around the jar so it hung nicely. Added some burlap, a button, some lace ribbon...for extra cuteness. 


And for the lid, I just followed THIS super simple tutorial with some extra thick cloth fabric, polyfil & a glue gun.


love, love, LOVE how it turned out - it's all about finding the inspiration, then tweaking a few things to make it your own:

I think she loved it as well & hope she gets a little use out of it during her destination wedding in Hawaii next month :-)


In addition to the emergency jar, I also gave her a personalized wooden hanger, with her soon-to-be new last name in wire...perfect for hanging up her wedding dress the day-of!

This exceptionally beautiful, hand-made hanger was made by the super talented San Diego-based: "Burlap Babe" - who far exceeded my expectations, booth in speed (I ordered it with a day turn-around request) and in quality - I mean...I'm crafty & could have attempted this myself, but it would've looked like a preschooler made it! Check out Burlap Babe's site (linked above), her Etsy shop & FB page!


Can't wait to see pics of her dress hanging up on this unique piece of work:


 Congrats Crystal & Lucas!! 


Tuesday, November 15, 2011

Introducing - my craft corner!


Calista's Craft Corner is DONE!

I cannot believe I have transformed this little area in only 4 days. I'm soooo mad at myself for not taking a BEFORE picture. But you can just imagine it in your head....computer monitor, keyboard, mouse/mouse pad, speakers, stacks of paper, blank/recordable CD's, and an old school 1985-style hideous lamp.

Booorrrringgggg. It needed a little T.L.C.

Prepare for picture overload...excuse the crappy iPhone pic quality...cam is still on the fritz. I'm so much more inspired now with my bright 'n cheerful craft space & cannot WAIT to create more fabulous "Custom from Calista" orders here in this little corner!! Bring it!

So first is my repurposed "CRAFT" sign...recycled from an old "martini" sign I had laying around. I bought the white wooden letters from Michael's at $2.99 each, but used a 25% off entire purchase coupon, score!

I made a few of the famed items...obviously the burlap "Calista's Corner" sign that I'd previously made.
yucky colored desk...one day I will paint it!

I bought some embroidery thread and simply wrapped it around cardstock paper shaped like bobbins, then glued them onto the paper behind it (no glass in front so they pop out with a 3-dimensional look). Love all those bright colors.

Then I printed out a vintagy French lace bobbin picture and typed in "ĂȘtre inspirĂ© " in the lower left corner, which means "Be Inspired". I also found a cute vintage dress form pic online & just printed it out. Then I saw this inspiring quote by Julia Child on Pinterest & thought it'd be perfect for my corner.

I also found this on Pinterest and re-created it in Picnik to my liking.


I had the ribbon holder before, previously installed on a wall in my dining room...

But then I found a discounted $5 paper towel roll at Ross & voila! Instant ribbon holder for those with smaller holes that won't fit on the actual 2-tiered ribbon holder on the wall (& I still have a whole other box of ribbon spools too...oye). Also at Ross I found the wire dress form (lower right corner of pic) for $7 that I just could NOT walk away from...it was screaming my name - I knew she'd be right at home on my craft corner desk. I think she'll come in handy for taking pics of future new flower clips, necklaces (like below), or even bibs!

Next to that is a flower vase, made from an old syrup bottle (the Grade B stuff from Trader Joes - which I commonly use while doing the Master Cleanse). I just cleaned it out really well, scrubbed off the outside labels, spray on a couple coast of white paint, then when it was dry I wrapped some grey-ish yarn around it (glue gun not even needed!)...then stuck some fake pink hydrangeas (from K's 2nd bday party) inside. Perfect floral touch to my desk...me happy!

The hanging shelf in the top left corner of pic is actually a $12 shower head rack, haha...perfect! The little jars on the 4 boxed-shelf are $1 from Michael's (also bought along with the wooden letters with coupon) - perfect for all my buttons!


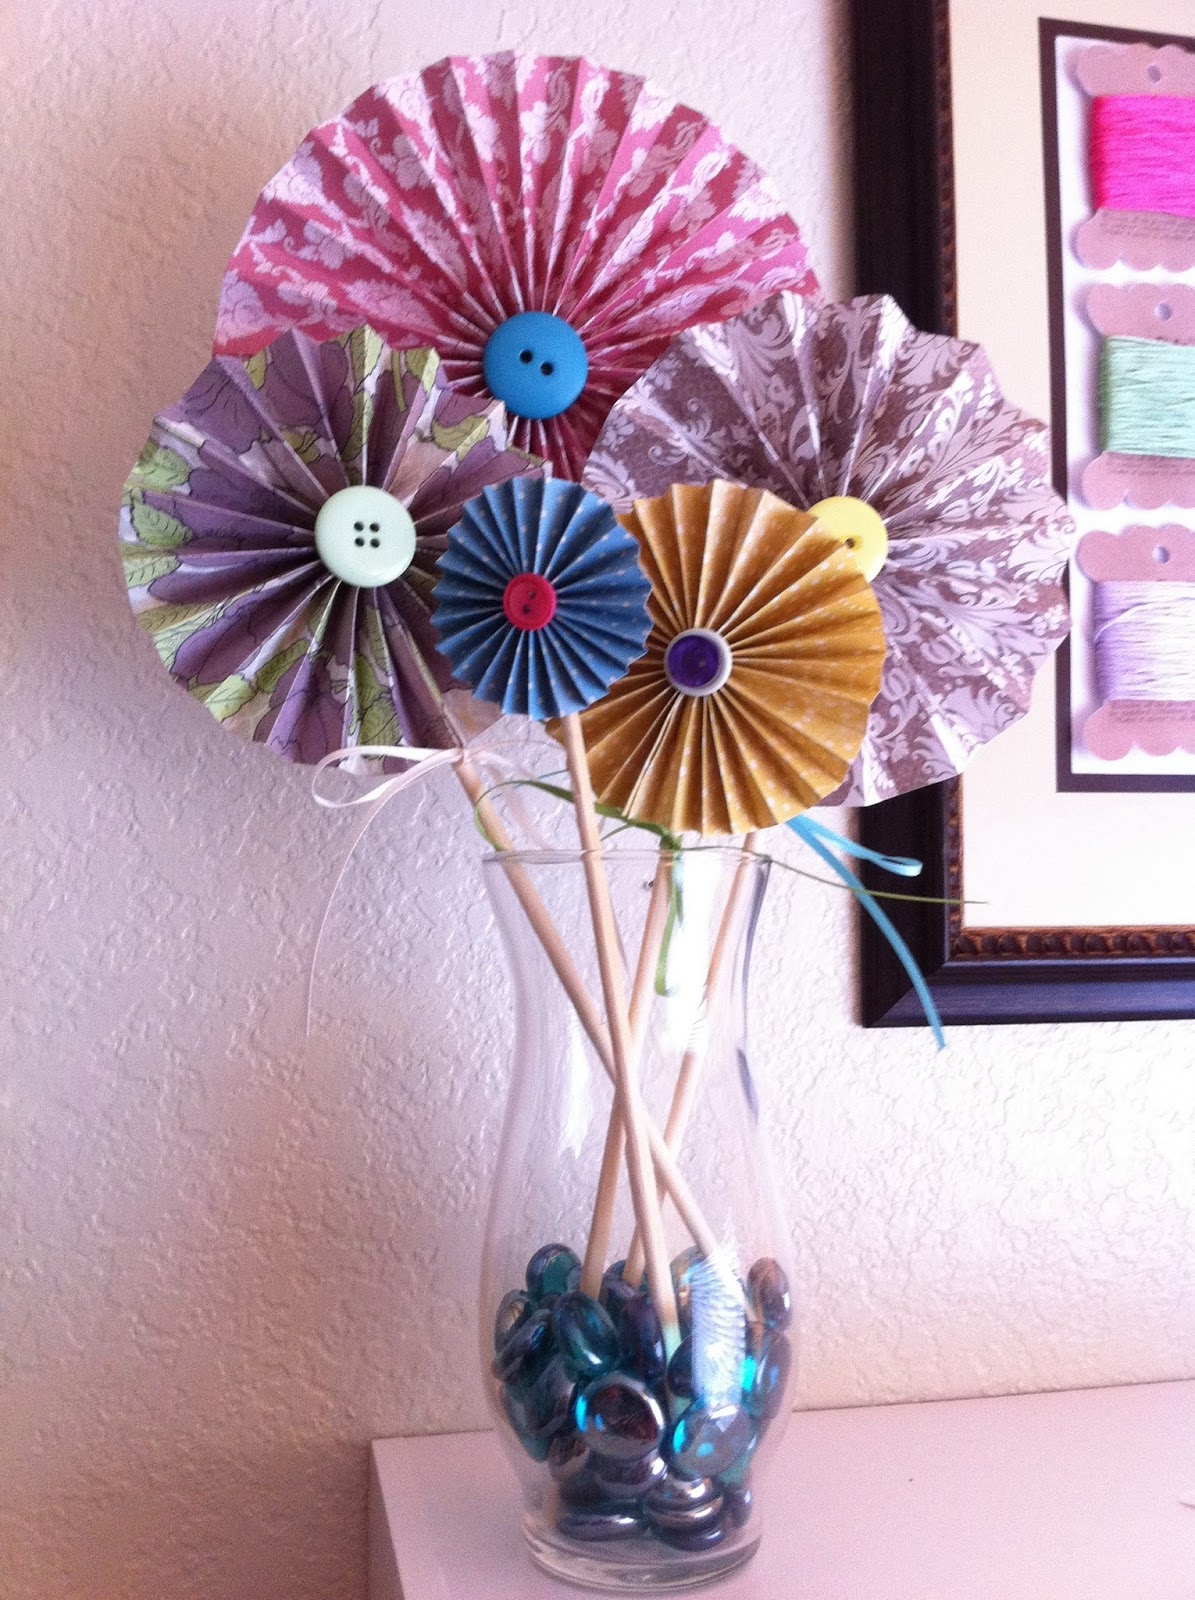
The flowers on top of that shelf are paper flowers with buttons in the middle that I made...and I love them dearly - they were so simple to make and I love all the bright, contrasting colors all together in a little vase with glass 'pebbles' on the bottom.

I found the magnetic knife strip online for $15, because I knew I needed to keep all my scissors up high, out of reach of Kapri's curious little hands...so they're up high in the corner, even somewhat difficult for shorty me to even reach! Another fav online find is the thread spool rack, with a little wire shaped sewing machine on the stop. I thought I had less thread than this....sooo, I may need to find another way to hang more in the future.

And last but definitely not least...my fav items would be these 3 dress form mannequin pin cushions!!! I am so in love with these...not only were they relatively easy & quick to make...but they are adorable AND practical! Because they're filled with poly-foam stuffing, they make the perfect holder for pins! It's just genius. I stumbled upon this "DIY Dish" how-to video late one night, when I should've been sleeping...but I just couldn't get over these & knew I had to make them. My only annoyance is that the glass candlestick did NOT adhere to the fabric bottom of the dress form...it literally came off the next day. So I had to reattach them with E6000 glue. Problem solved ;-)


Thursday, October 13, 2011

Burlap Mania


I have developed a major love for burlap. I have a whole pin board dedicated to it! I've had a TON on hand since I made Kapri's growth chart back in March. I actually forgot about it...until recently - which explains the burlap button pumpkin. I also had a $.99 wreath that was mega sad & lonely. Burlap was its rescuer!
This literally took me about 30 minutes (fabric flowers were previously made and waiting for a good home) to make last night. I just used 4 long, 3 to 4 inch wide pieces of burlap - 1 was used to wrap around the wreath...and the other 3 were sewn together to form one looooong string, then I just quickly folded over & sewed little pleats.

No pinning, no measuring...just went with it. Then I attached that with glue gun to the back of the round wreath.
I was going to add some black ribbon somewhere...to make it more "Halloween-ish"...but I really wasn't feeling it. Nor was I liking a bright green...so I went with teal for the middle of the yo-yo's. I think these are good, neutral, somewhat Halloween/fall colors.
The flowers were made a few nights ago...the big orange one was just one long strip of fabric, sewn down one side, then I pulled one end of the string to make it gather up. The 2 small "yo-yo's" were sewn by hand with this fab 2-minute video tut! Then I attached them with small squares of sticky-back Velcro, so that I could inter-change the wreath with different fabric flowers to coordinate with different seasons/holidays/etc. Smart huh?!! haha

I may want to add a little mini bunting across the middle of it...saying "Happy Halloween" or something.

And now it hangs happily on my front door. Thank you burlap!! Now what to do with you next?........

Sunday, October 9, 2011

Button Crafting

Not sure what's behind my latest 'button' craze - wait....actually, I blame credit Pinterest!! I definitely got a few cute crafts out of it! These are pretty easy, but definitely a bit time consuming if you're a slight perfectionist like moi. For me it was the length of one of K's naps. Done & done.

My neighbor's daughter is having a 'butterfly-themed' 2nd birthday party outside on our perfect little greenbelt this afternoon. About a week ago I decided to make a framed pink & green button butterfly with her name on it, to go along with the theme. It's adorbs. Thinkin I could add these to my CfC site?! Butterflies, flowers, ladybugs...the possibilities are endless!!


Then after that was completed, I realized I had a good amount of orange buttons - so I made a burlap button pumpkin, on an old dollar store frame I had laying around. I love burlap! Gives any project a slight rustic, charming look. What made these projects a bit time consuming is arranging all the different sized buttons in a good layout. Then once you've achieved your desired look, you just pick one up at a time, glue the button then lay it back down. Of course, a circle is much easier than the butterfly shape!


It sits atop our dining room hutch, along with some complimenting orange poppies and my handmade, scrapbook paper & mod podged frame, with pic of our little fam from last year's pumpkin patch trip ;-)
gahhh, cannot believe how small K was just a year ago!!
I have another cheapy frame that needs some love...thinkin I'll make a button "K" for Kapri's room - would be so cute on the outside of her door...hung with some pretty sheer ribbon! Now...to burlap or not to burlap...Stay tuned...thinkin it's time to make a special 'burlap' crafts Pin board now! haha

Saturday, March 5, 2011

DIY Burlap Growth Chart

L.O.V.E. the growth chart I just finished making for Kapri. I've been wanting to make it for months now...probably over a year I would say. So I had to go back to her old doc checkup papers & her baby book to get her height at different months of age. I started with birth height, then 6 months, 1 year, 1 1/2 year...then will do once per year, 2, 3, 4 & so on...probably til like, 15 or 16...maybe. That may be weird, for her then, haha...but she'll appreciate it later!
I found this adorable box that has a magnetic flap at Michael's...super cheap as it was 40% off...love that. So it's all stored in one place...her own little keepsake.

I found this how-to, after searching for something I could sew with fabric...but once I saw this one, I knew I had to make one for K with a similar design, but with my own style & colors. The supplies were super cheap...and was extremely easy to make.

I used a strip of burlap, a wooden dowel (cut in 2 pieces, and sanded the edges), ribbon, and liquid stitch clear-drying glue to attach the beige ribbon down the middle and to attach the burlap to the dowels (top & bottom). I was going to do the stamped #'s (marking the inches), but then decided it wasn't super necessary, so I saved my $...stamps/ink are expensive!!
I stuck a push pin into the pillow so it can be hung anywhere anytime I need to measure!

Then I made a little 'pillow' for the bottom of the box, so the supplies didn't slide around...and also made 2 little pouches, one for the safety pins & one for the cards...which are made out of scrapbook paper, pieces of masking tape and a hole punch. Then I just have to write down the date, her age, and her height on them.

It's simple. It's perfect. It's unique.... Maybe down the road when baby #2 arrives, we can use the same one, just have different colored cards and mark their names on them. ;-)


Related Posts Plugin for WordPress, Blogger...
Blogging tips